When we bought our house in 2009 it felt huge! We had our living room, kitchen, dining area, “master” bedroom (maybe in the 50’s it was big- but now it’s a joke…), spare bedroom (now nursery), and an office. The previous owners had finished the basement, which had a large living area, back yard access, and then a hall to the laundry room, and my studio. On our list of must-haves for our house was a studio for me (I bring a lot of projects home and it’s messy!), a man cave for Joey, and a suitable entertaining area. I did not get some things on my list with this house, such as, a covered front (or back) porch, fireplace, large master bedroom/bath. But I settled for a back deck off the kitchen, and the possibility of combining some rooms to make a bigger master. I’m already making my new list. How much you learn the first time you buy a house! We loved all the space this house had. And it did have a lot. But there is a phenomenon that I didn’t quite understand till now. Like a goldfish that is put in a pond or bath tub, your “stuff” will grow to fit your space. (Weird).

Giant Goldfish. Click to read how they say this is actually a myth.
So we decided last January that we would gut the downstairs and make a Master suite and move my studio upstairs to our old master bedroom. Great idea. We ripped all the paneling off (and by “we” I mean Joey and his dad of course!) which we had to do anyways because we were having water leak issues (long and boring story) and proceeded to rip down walls, built-ins, had a big yard sale with extra furniture, yada yada. Then we found out we were having a baby- and the whole project got put on hold to make a nursery.

Manly Man Cave- great for watching Football! Go Hogs GO!


My old studio was going to be our new closet.
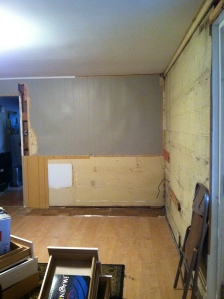
Taking out the wall, paneling, built-in cabinets

Wall coming down
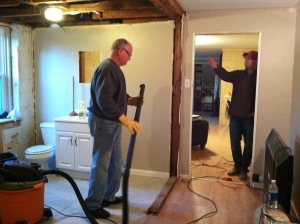
Ripping out the Hallway

Laundry Room

Inside this wall we found the house blueprints!!

Joey thinks this is the easy part!

Project supplies.

This is the view from the stairs before the tv and cabinets were taken out.

New Floors!
We ended up having to get new floors because the one we had from Home Depot were discontinued, and we needed one more box to patch where the cabinets had been. So we ended up getting some laminate flooring from Lumber Liquidators that I just love.
So it was almost October after Lila was born, that we decided that we didn’t want the master suite downstairs, since her nursery is right next to our room now. And we are now putting the downstairs back together.
Our 2600 sq foot home has been missing about 700 square feet of living space and we are going stir crazy tripping over dogs, cats, bouncers, jumperoos…. So we are resolving the water issues, we paid someone to finish dry walling, and Joey and his Dad are finishing putting the floors in this weekend. We will be picking out colors for paint soon. I’m excited. I have great ideas for the space. What color would look good with this deep brown wood?
I will post more progress pics soon. Stay tuned!
If you like it, share it:


